WooCommerce Customizer is part of WordPress > Customize and makes it possible to select options that apply site-wide for Store Notice, Product Catalog and Product Images without touching any code.
Where to find WooCommerce Customizer
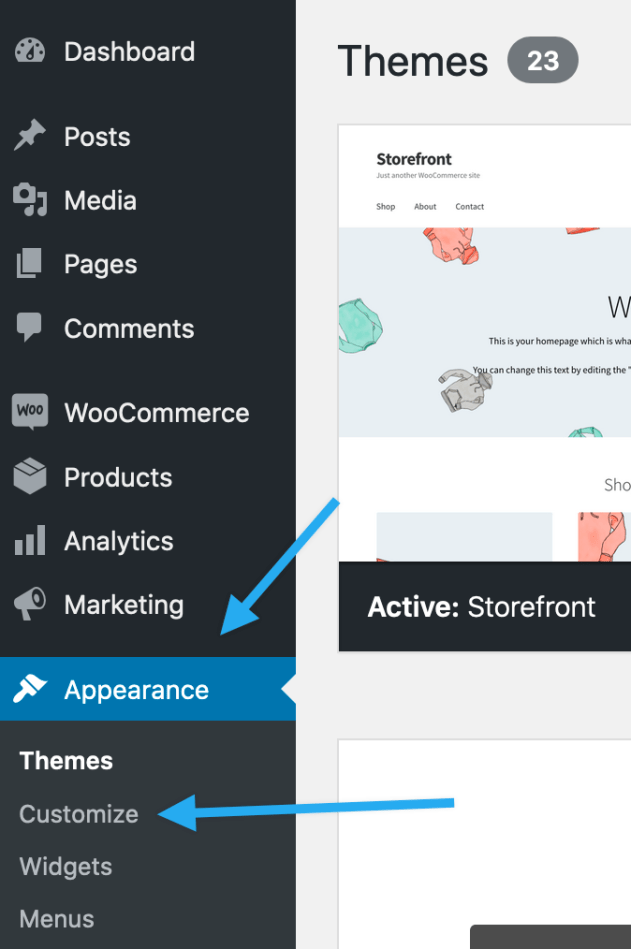
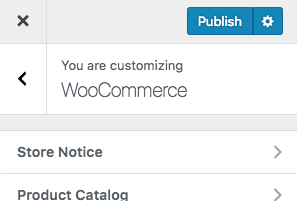
From the WordPress dashboard, go to: Appearance > Customize.
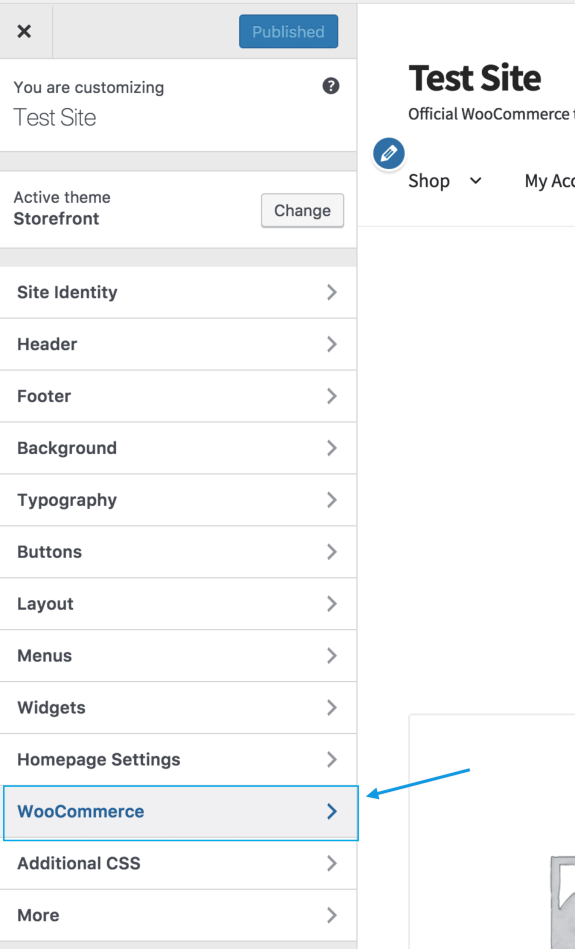
In the Customize menu, select WooCommerce:
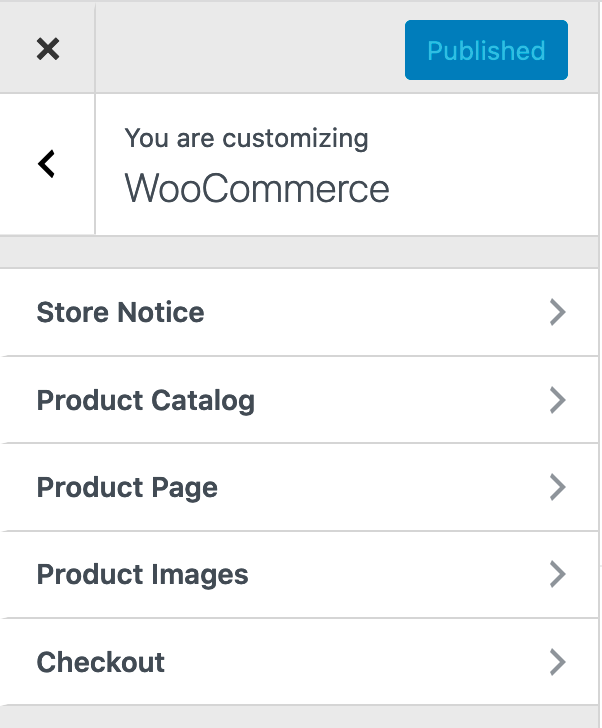
Under WooCommerce are five options:
- Store Notice
- Product Catalog
- Product Page
- Product Images
- Checkout
Each is covered in detail below.
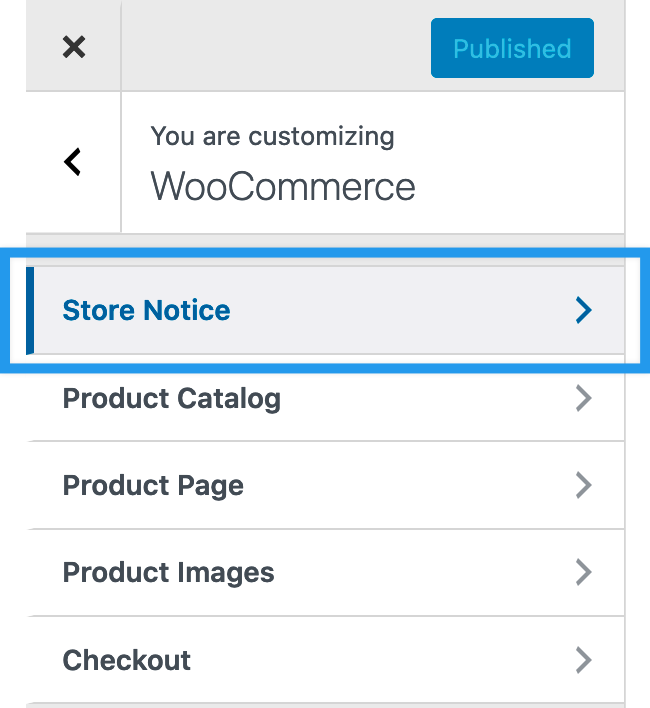
Store Notice
Store Notice allows you to enter a site-wide message shown to everyone visiting your store. The message can be:
- Informational – A note that tells customers of shipping delays due to weather conditions. An ‘away’ notice if on vacation.
- Promotional – A note advertising an event, a holiday special, a bundle, a sale on all/some items or free shipping.
Display a Store Notice
To show customers a site-wide Store Notice:
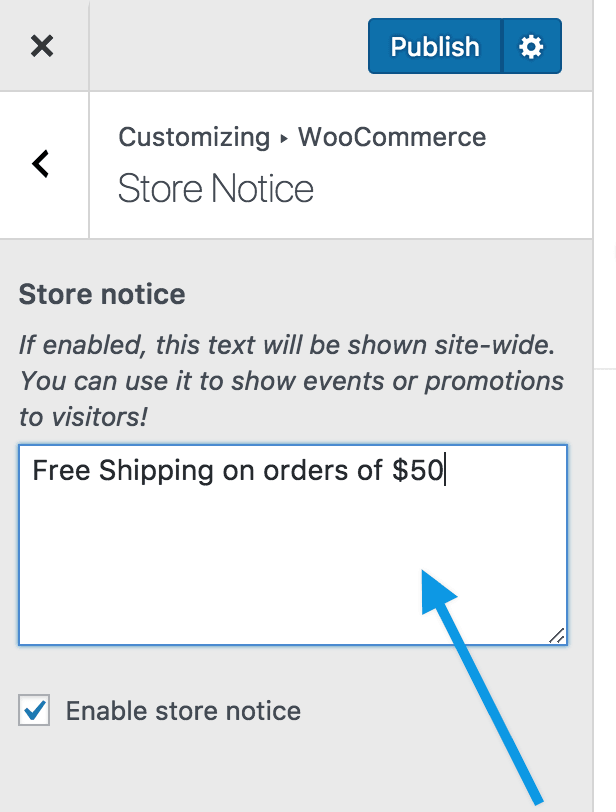
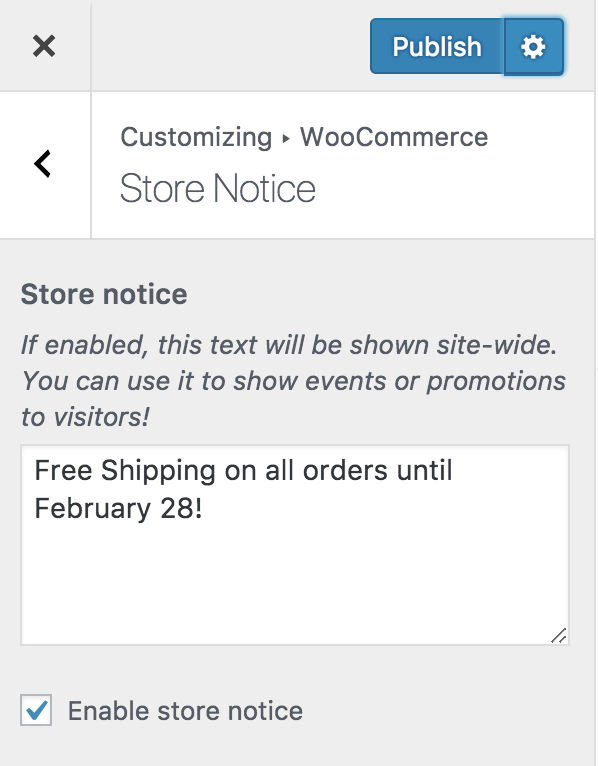
1/ Go to: Appearance > Customize > WooCommerce > Store Notice:
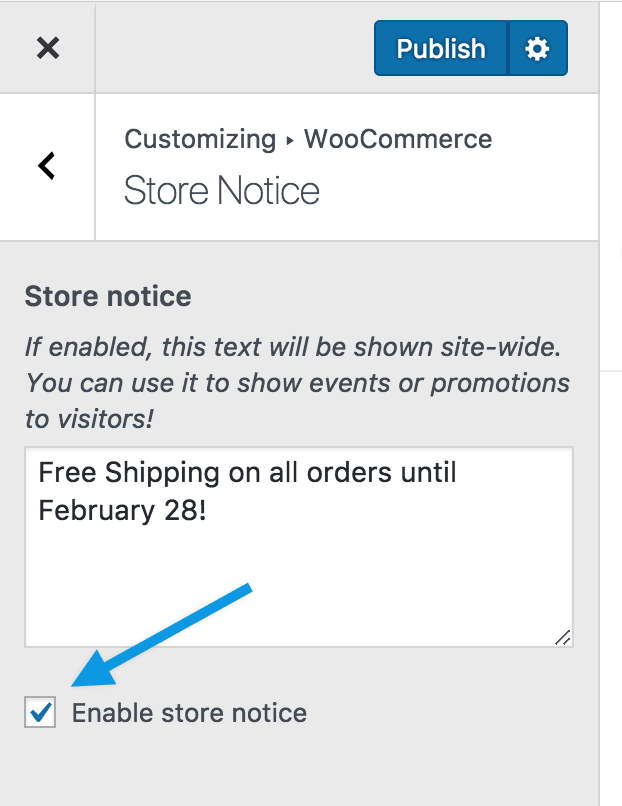
2/ Enter a message in the text area.
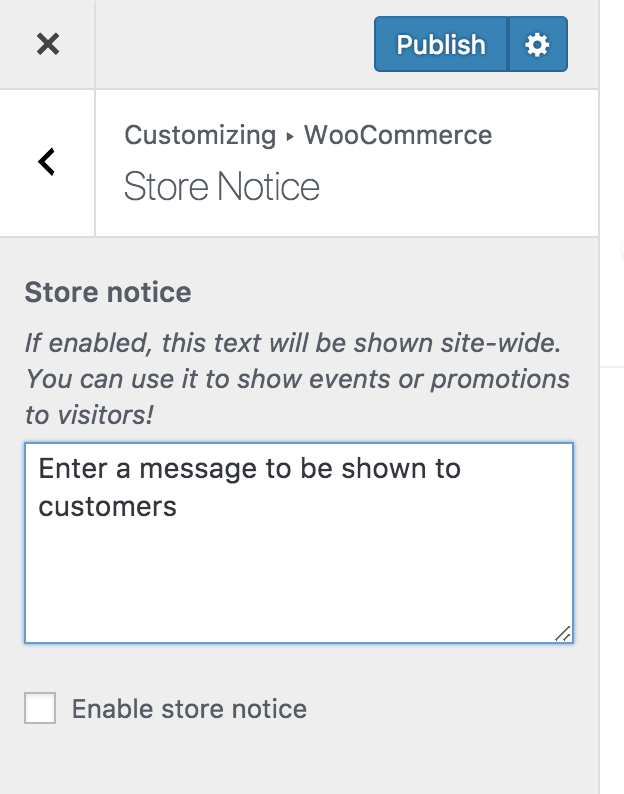
3/ Tick the box for Enable Store Notice.
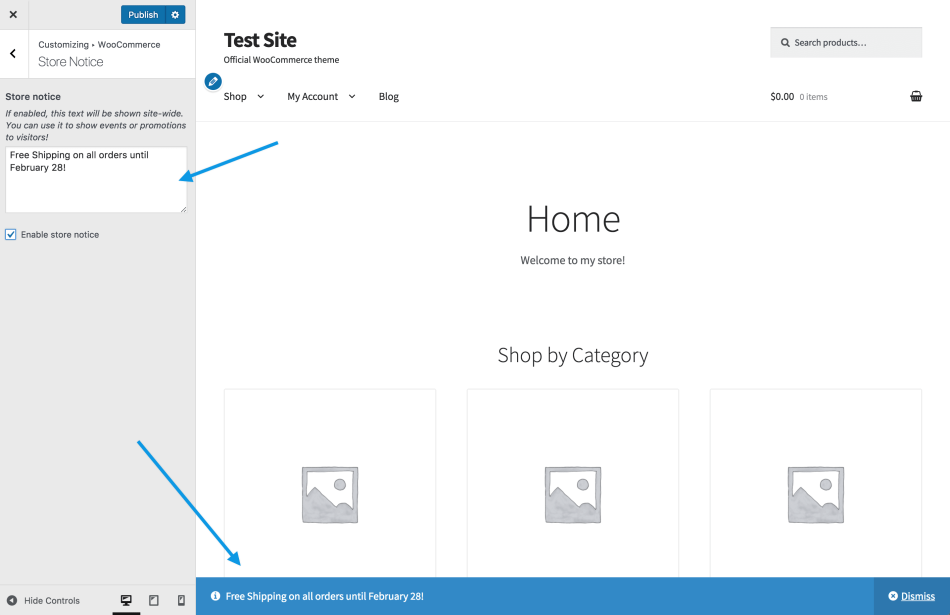
4/ Preview how the Store Notice looks on your site/store.
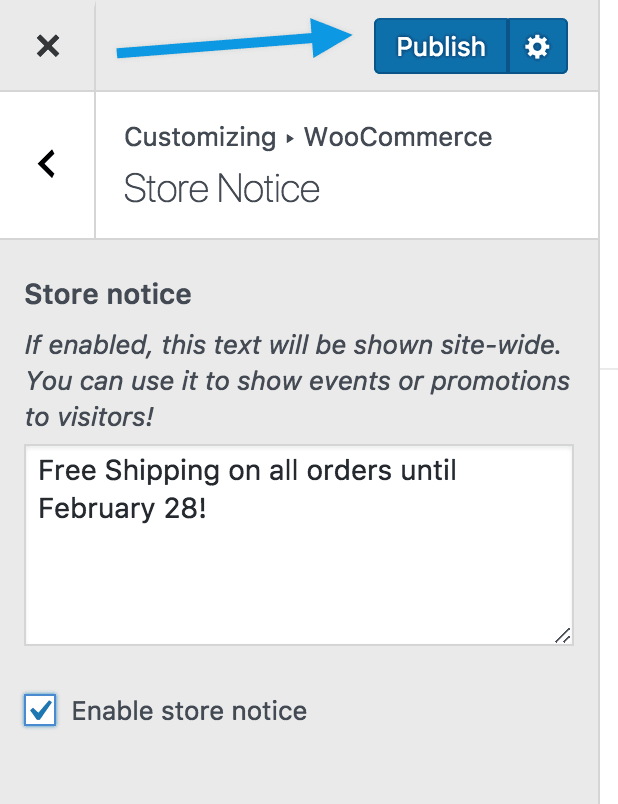
5/ Publish when satisfied and ready for your Store Notice to go live.
What Visitors See
This is how the Store Notice displays on the front end of your store/site. Visitors can choose to Dismiss the notice after seeing it once.
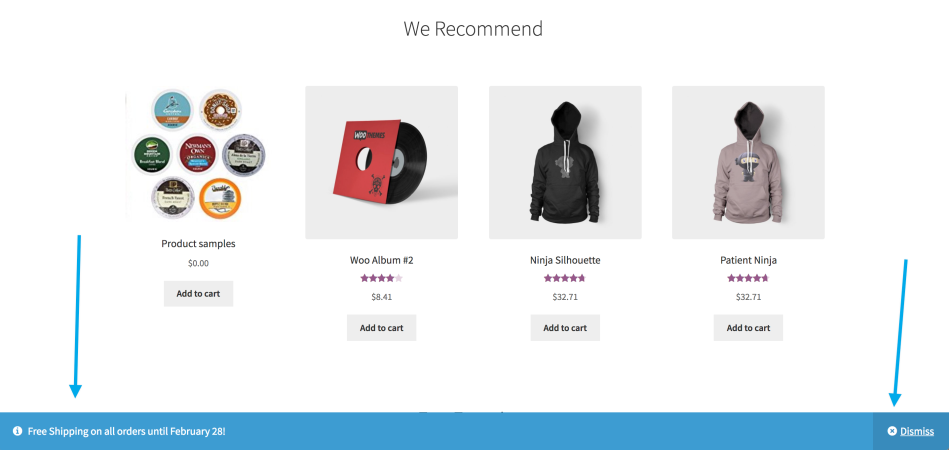
*Location and appearance of the Store Notice will vary, depending on the theme you’re using. The screenshot above is with our free Storefront theme.
Edit or Remove a Store Notice
To change or stop displaying a site-wide Store Notice:
1/ Go to: Appearance > Customize > WooCommerce > Store Notice:
2/ To alter the Store Notice:
- Edit the message in the text area to change it.
- Untick the box for Enable Store Notice to stop displaying to visitors.
3/ Publish to save changes.
Schedule a Store Notice
Using the Schedule option for Store Notice can be helpful when running a promotion for a limited time or ending a sale/discount at midnight on a specific date.
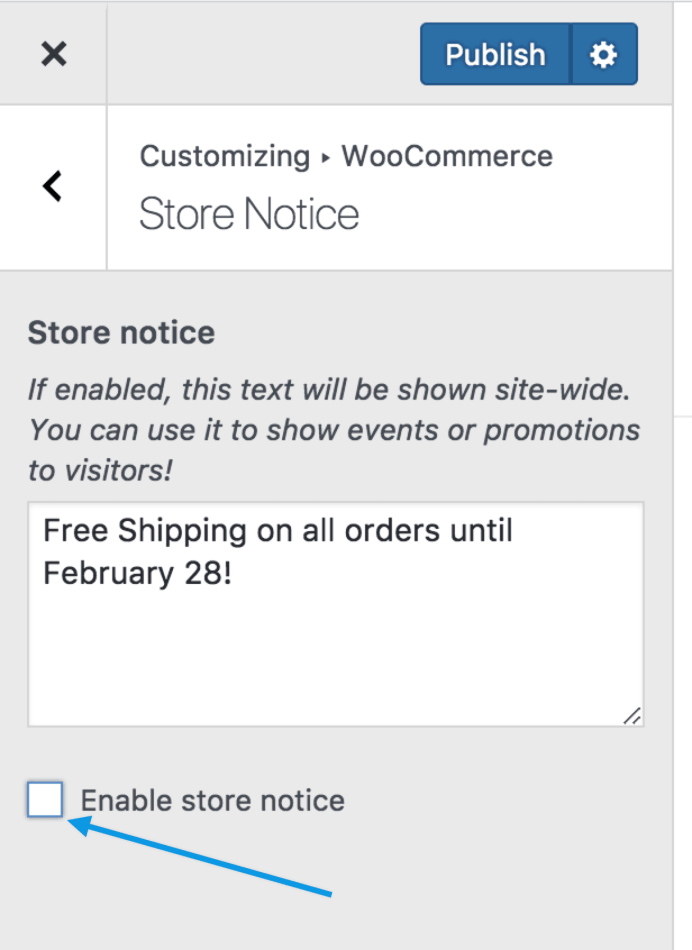
In this example, we want to discontinue the Free Shipping offer when it expires end of day on February 28.
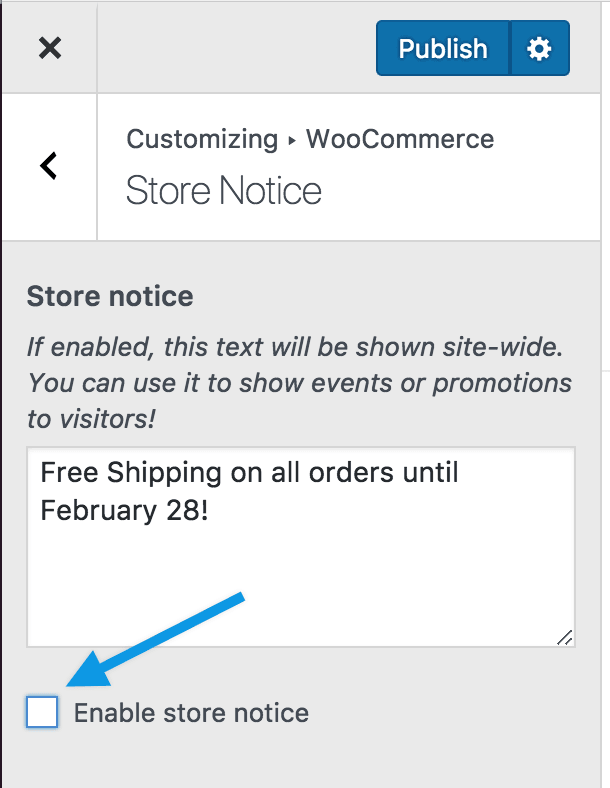
1/ Go to Appearance > Customize > WooCommerce > Store Notice to view and access the current/published promotion.
2/ Untick box for Enable Store Notice.
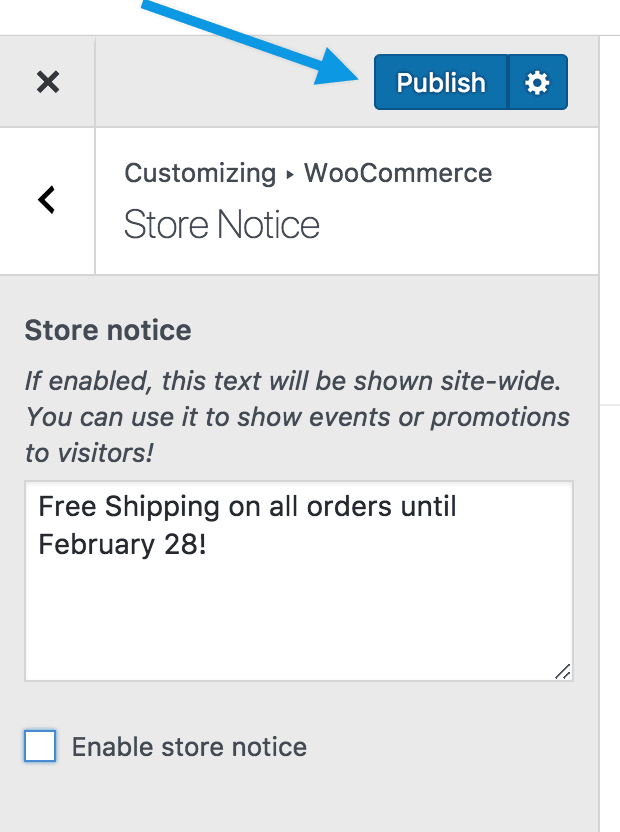
3/ Select the gear wheel. A panel opens.
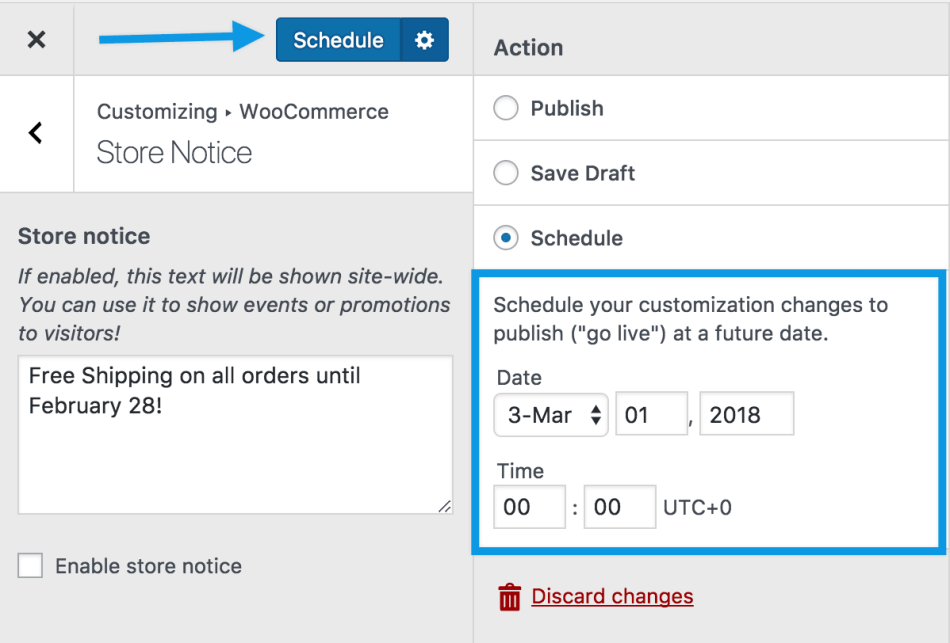
4/ Select Schedule on the right menu, then enter the Date and Time you want the change to take effect.
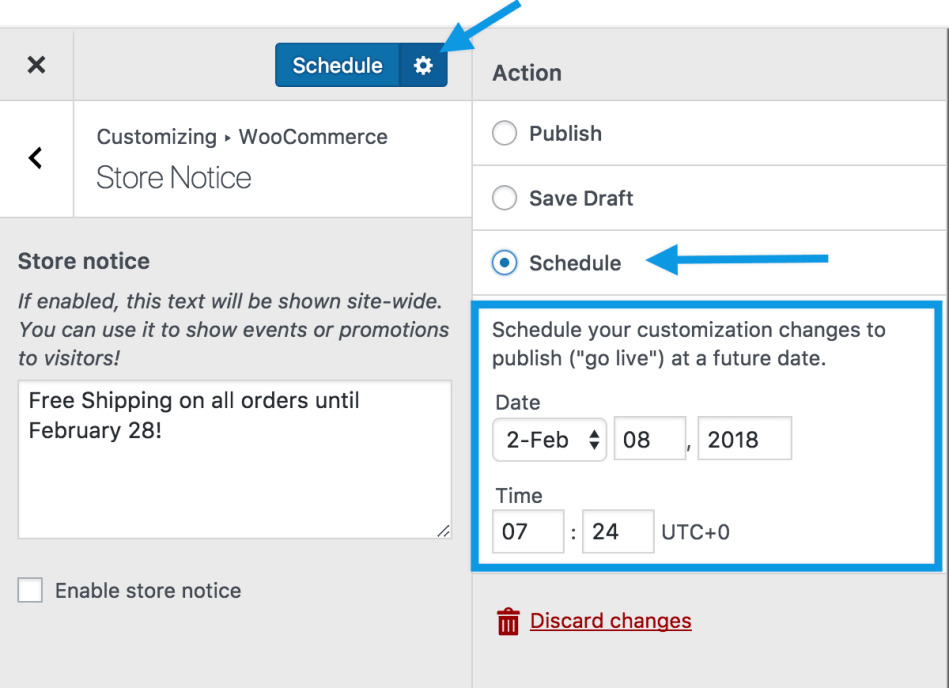
5/ Select Schedule to make changes you entered on the future Date and Time indicated.
*You need to disable sale discounts, coupon codes or limited time offers. Removing the notice does not automatically stop the promotion from running.
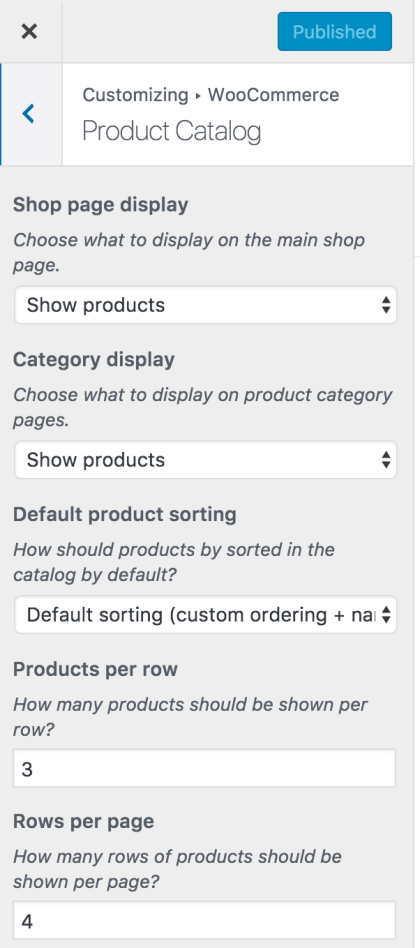
Product Catalog
All options for Product Catalog can be found at: Appearance > Customize > WooCommerce > Product Catalog.

Product Catalog allows you to choose:
- What to display on the Shop page
- What to display on Category pages
- How to sort products in a Category
- How many products to show in a single row
- How many rows of products to display on a page
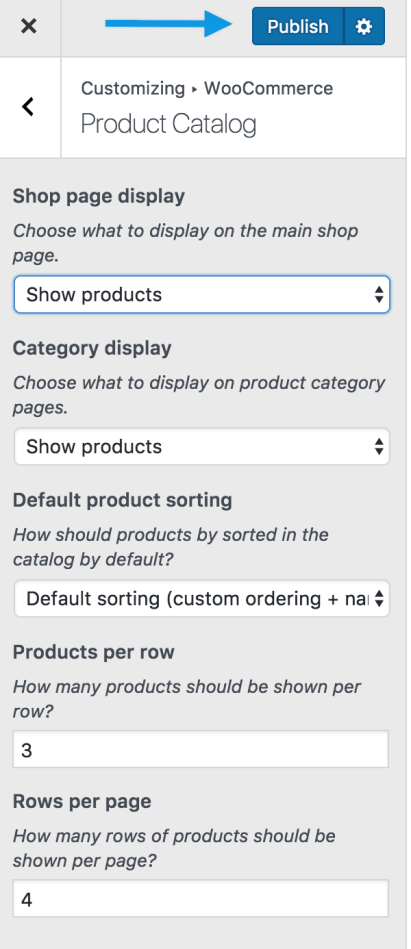
Shop Page
Your Shop Page can display Products, Categories, or both. We recommend selecting one for a clean look.
1/ Select Products or Categories from the dropdown.

2/ Preview your selection live. You must be viewing the Shop page.

3/ Publish to save and go live.
Category Pages
Your Category Pages can display Products or Subcategories within a Category, or both. Selecting one is recommended.
If you only have a few products, or you have no subcategories, there may be no difference in appearance.
1/ Select Products or Subcategories from the dropdown.
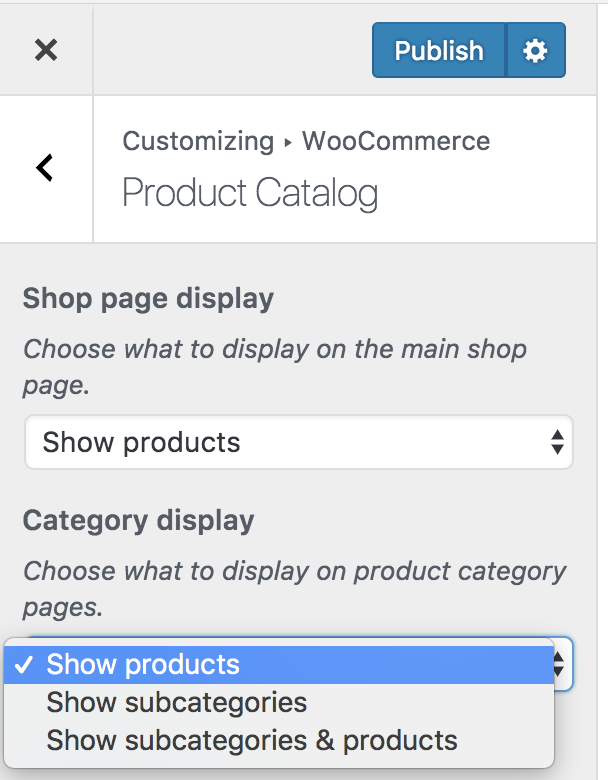
2/ Preview your selection live. You must be viewing a Category page.
3/ Publish to save and go live.
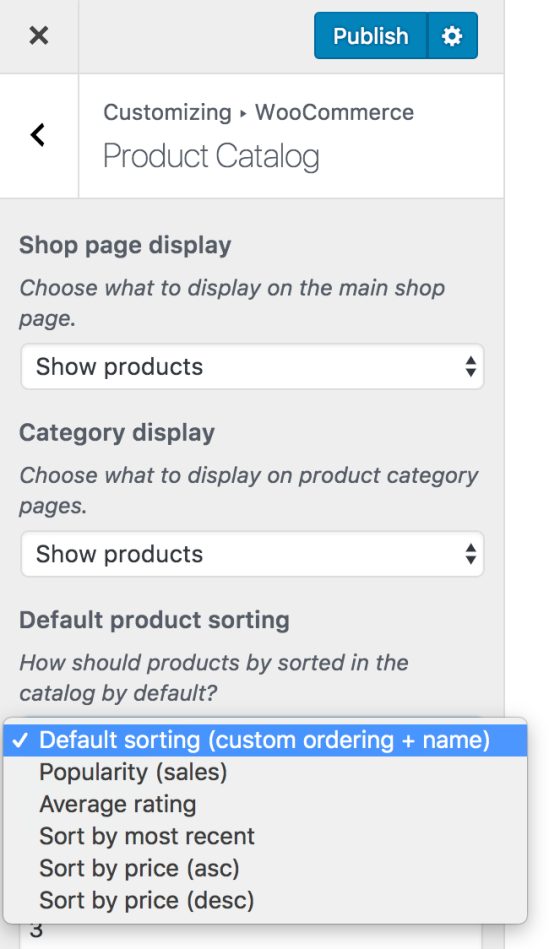
Default product sorting
Default Product Sorting allows you to control the order in which products are displayed, which influences how products are viewed by default on Shop and Category pages. Visitors still have the option to sort product in a different way, if desired.
Default sorting (custom ordering + name) – display products alphabetically by name. Where the product sort order has been customized, that custom order is considered first, and alphabetically by name second (if products share the same order positions). In your store, customer will see this as Default Sorting.
Sort by Popularity (sales) – display products according to amounts sold, from most to least. Customers see Sort by Popularity.
Sort by Average rating – display products based on average review ratings, from highest to lowest.
Sort by most recent – display products in the order they were added to the store, newest to oldest. Customer see Sort by Latest.
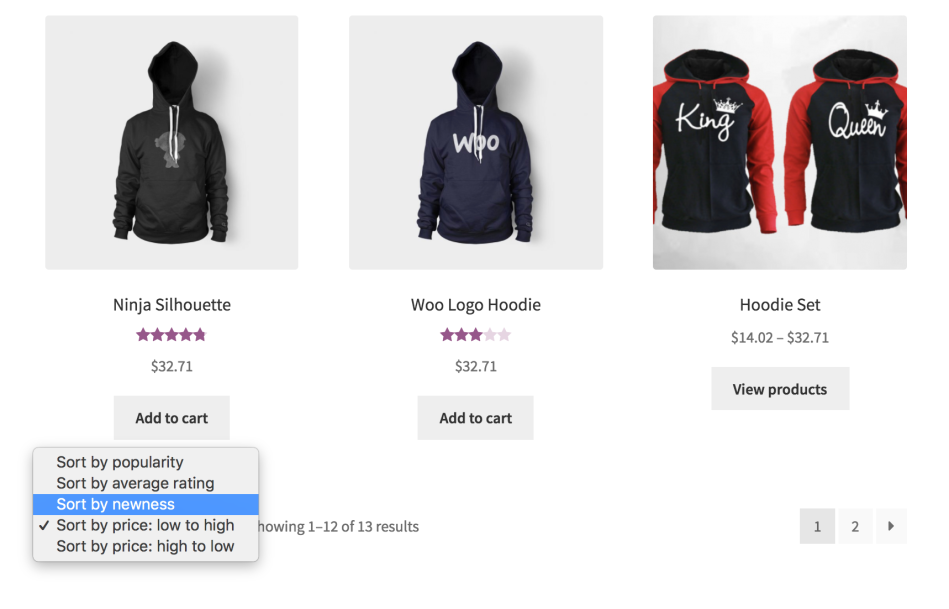
Sort by price (asc / desc) – sort product by price either lowest to highest (asc) or highest to lowest (desc). Customer see either Sort by price: low to high, or Sort by price: high to low.
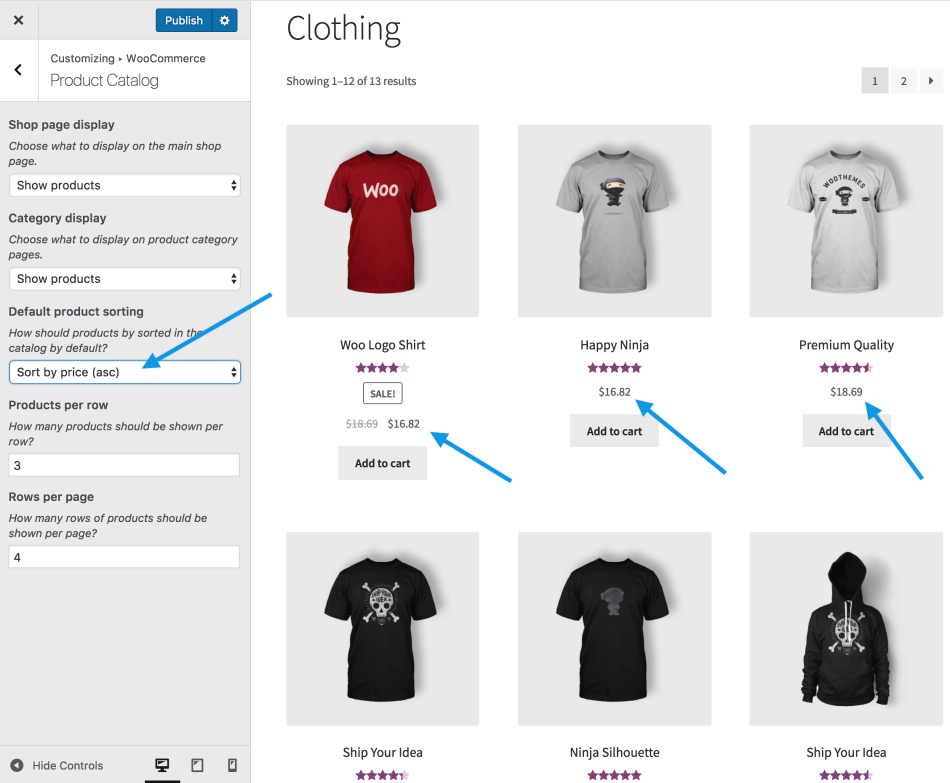
In this example, we’ve chosen Sort by price (asc) (Sort by price: low to high, shown with a  ), and the customer is about to select to Sort by newsness.
To choose a Default Sort Order:
1/ Select an option from the dropdown:
2/ Preview your selection live. You can be viewing the Shop page or a Category page.
3/ Publish to save and go live.
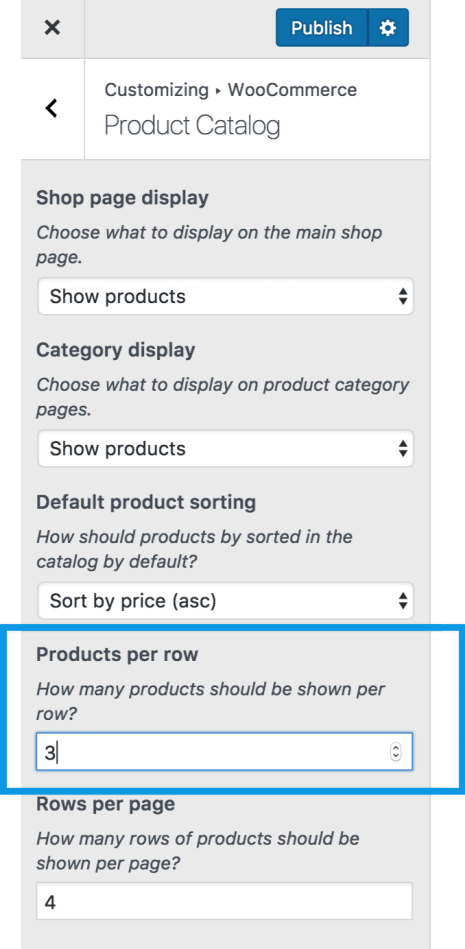
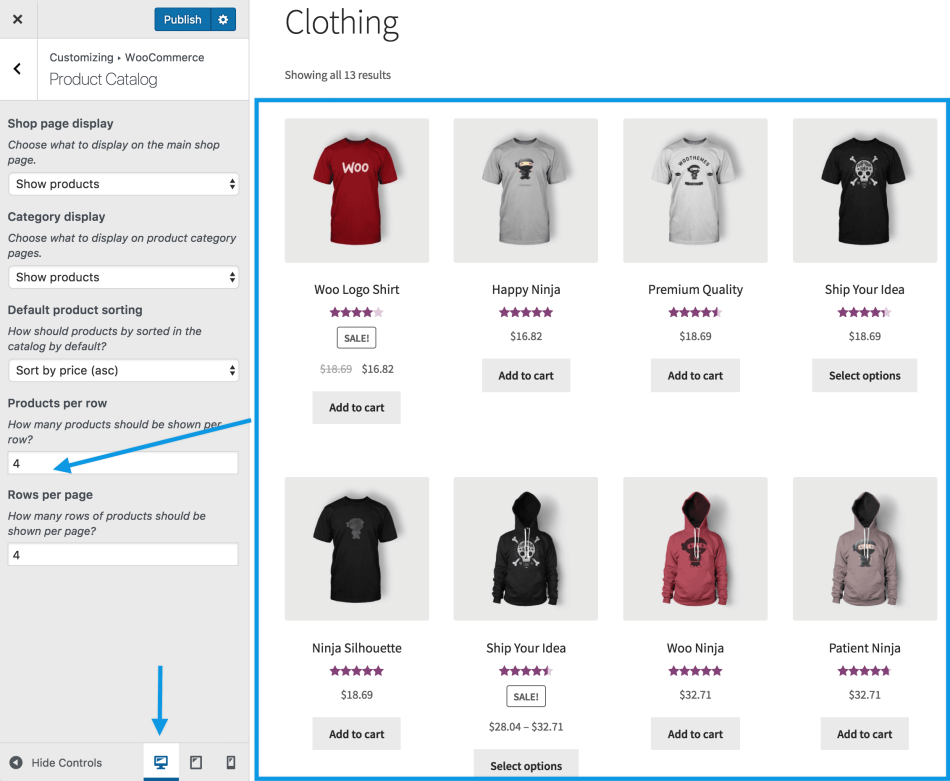
Products per Row
Products per Row allows you to choose the number of items that appear in a single row on Shop and Category pages.
Be sensitive to:
- Size of a product image
- Space on a computer/laptop, tablet or mobile device
- The optimal experience for a customer viewing and buying your products
1/ Use arrows to increase/decrease the number of products.
2/ Preview your selection live. You can be viewing the Shop page or a Category page.
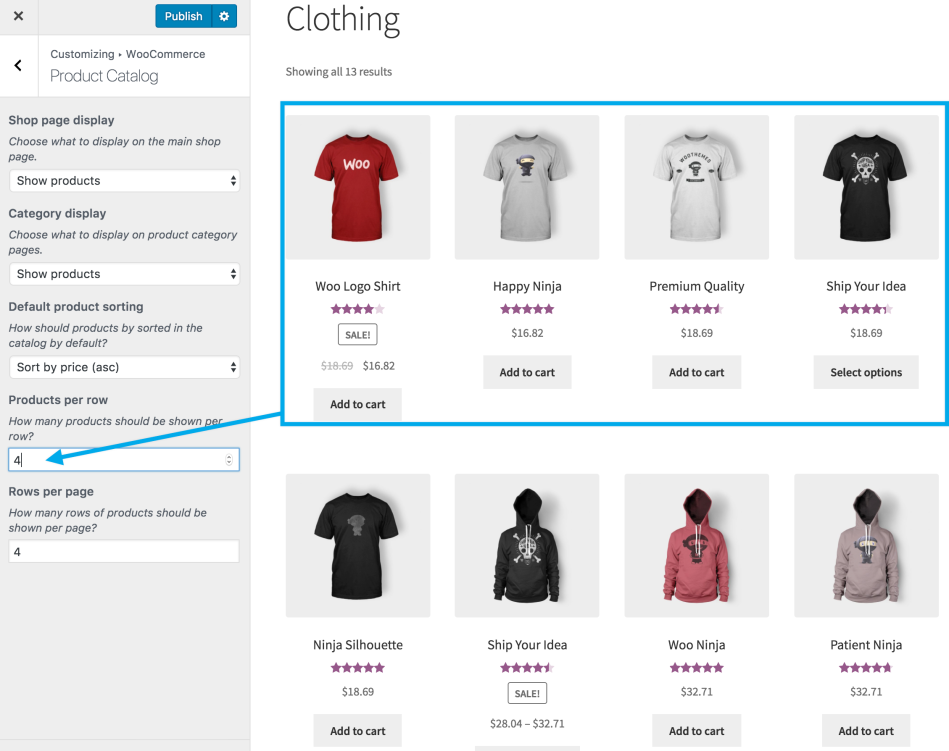
3/ Test on different devices. Below is an example of different views, using the same settings.
- On a computer/laptop screen
- On a tablet

- On a mobile device
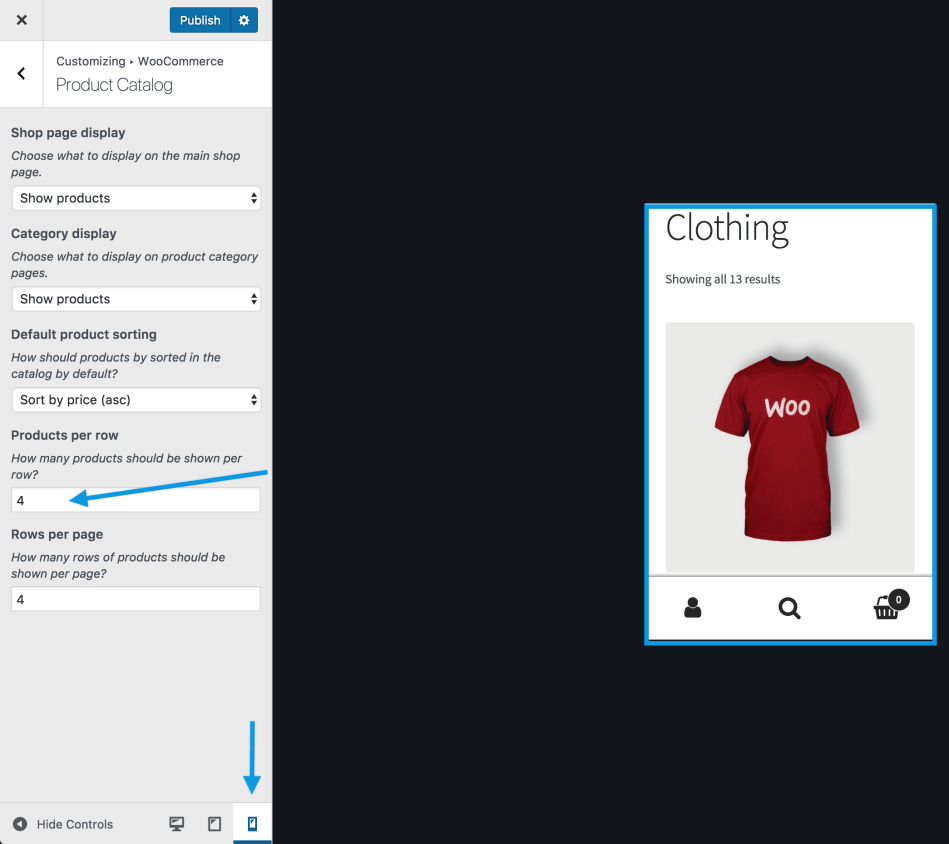
*Scaling of image size and appearance will vary, depending on the theme you’re using. Screenshots above are with our free Storefront theme.
4/ Publish to save and go live.
Rows per Page
Rows per Page allows you to choose the number of rows that appear on Shop and Category pages.
Be sensitive to:
- Size of product images
- Number of products you sell
- Space on a computer/laptop, tablet or mobile device
- The optimal experience for a customer viewing and buying your products
1/ Use arrows to increase/decrease the number of rows.

2/ Preview your selection live. You can be viewing the Shop page or a Category page.
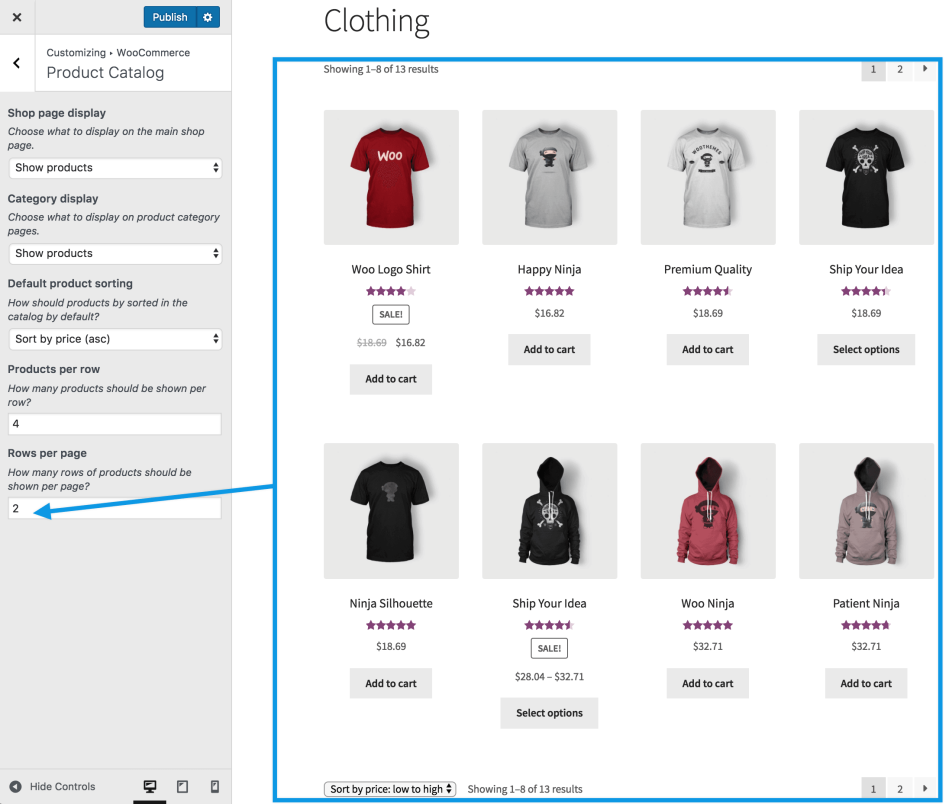
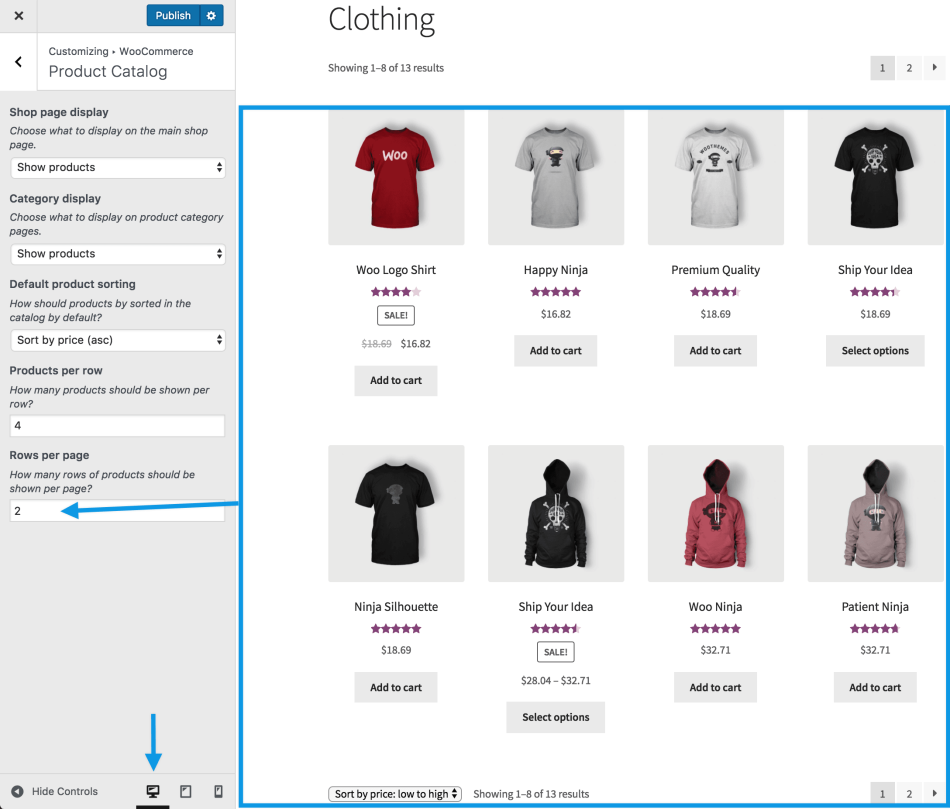
3/ Test on different devices. Below is an example of different views, using the same settings.
- On a computer/laptop screen
- On a tablet
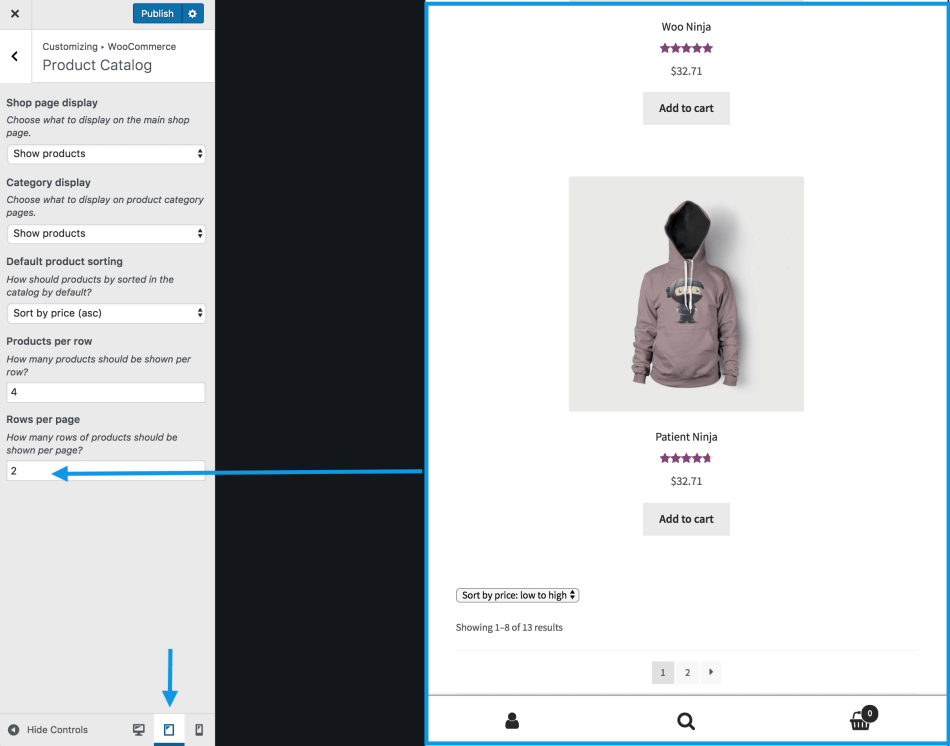
- On a mobile device
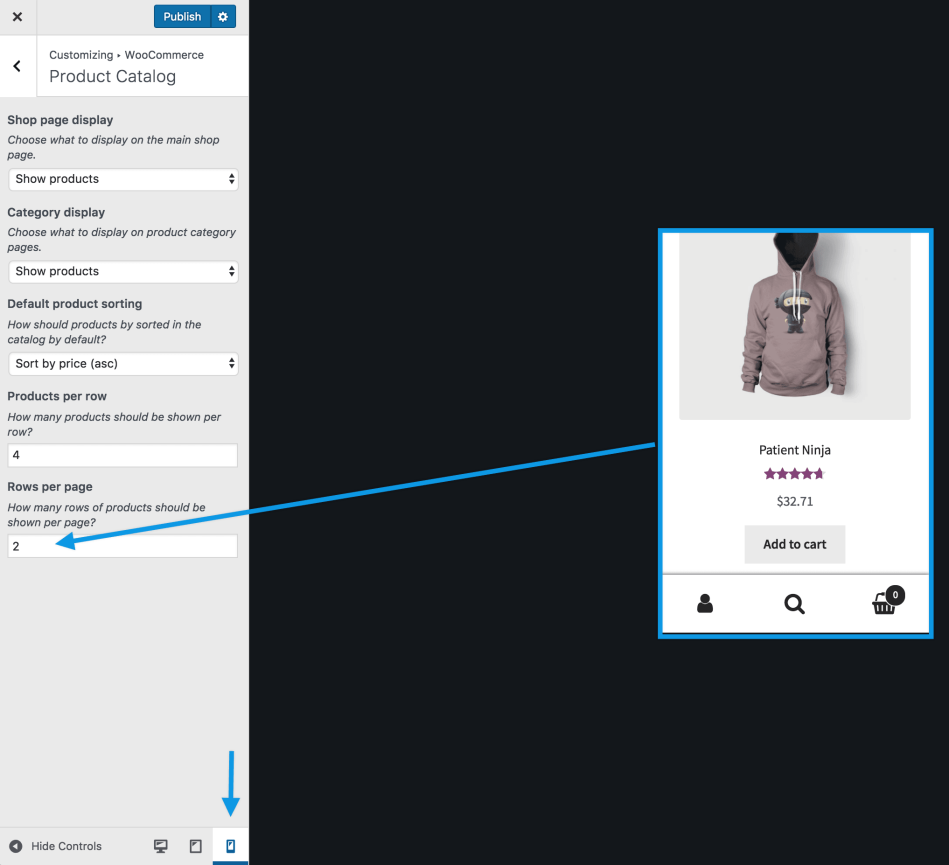
*Scaling of image size and appearance will vary, depending on the theme you’re using. Screenshots above are with our free Storefront theme.
4/ Publish to save and go live.
Product Page
Product Page has two options that apply to single product pages:
- Sticky Add-to-Cart – It’s a small content bar at the top of the browser window which includes relevant product information and an add-to-cart button. It slides into view once the standard add-to-cart button has scrolled out of view.
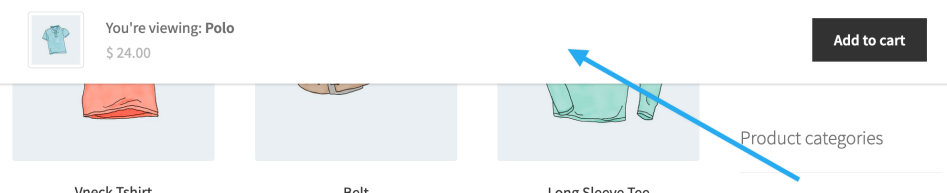
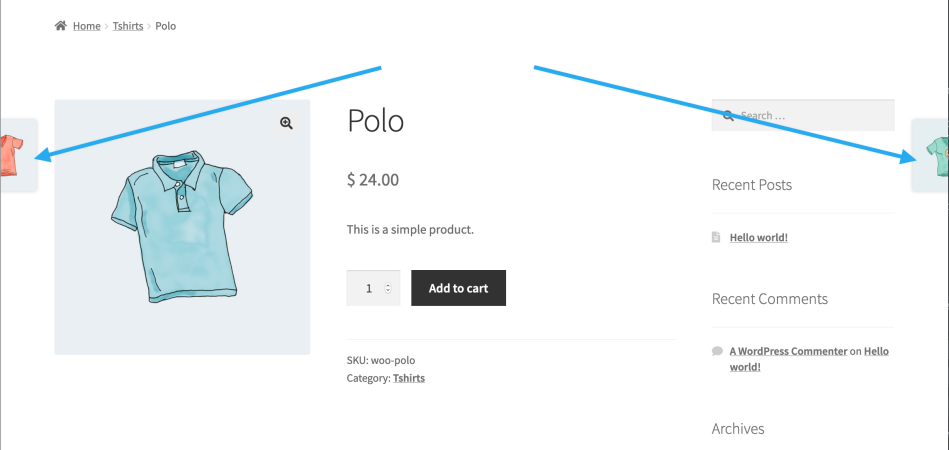
- Product Pagination – Displays next and previous links on product pages. A product thumbnail is displayed with the title revealed on hover.
Product Images
Product Images has two features:
- Allows you to select how Catalog and Thumbnail images are sized and cropped
- Automatically resizes Catalog and Thumbnail images site-wide on your store when a published change is made*
This saves you time and energy in manually cropping and resizing each one.
Image Types
- Catalog Images are medium-sized images that appear on the Shop page, Category pages, and for Related products, Up-sells and Cross-sells.
- Thumbnail Images are the smallest images used in the Cart, Widgets and (optional) Gallery images underneath the Single Product Image on individual product details pages.
- Single Product Image is the largest image and refers to the main/featured image. Product Images settings in WooCommerce Customizer do not apply to these. To add, edit or delete the Single Product Image or Product Image Gallery, see: Adding Product Images and Galleries.
* Previously, thumbnails needed to be regenerated using a third-party plugin. WooCommerce 3.3x now handles this for you. Regeneration will not be triggered for changed made only in Preview mode.
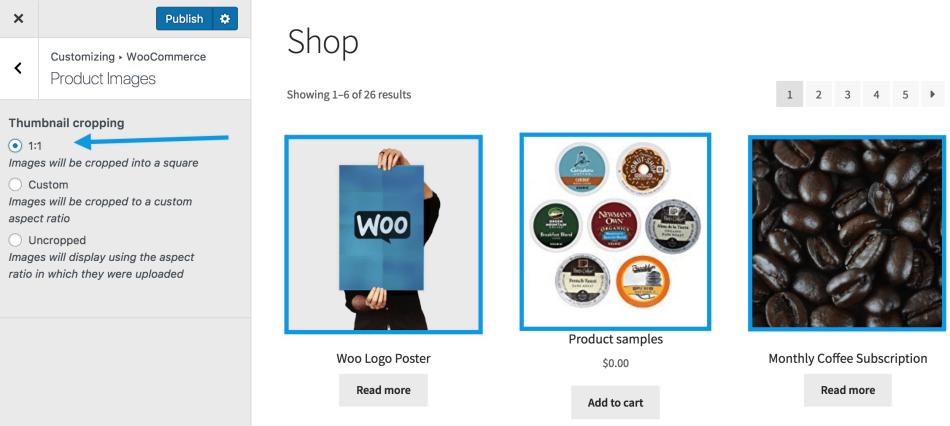
Resize and Crop Thumbnail Images
1/ Go to: Appearance > Customize > WooCommerce > Product Images.

2/ Select one:
- 1:1 – Square image
- Custom – You select the ratio in which images are cropped. In this example, 1:2 is entered; and one image cannot be enlarged to meet this requirement.
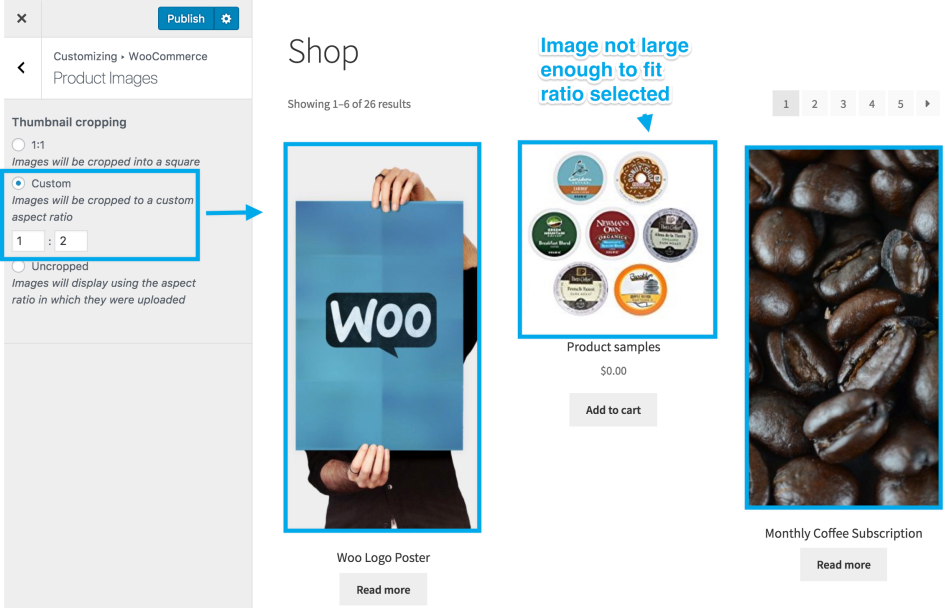
- Uncropped – Images appear as is, which can result in all being different unless you used photos that are uniform in size and resolution. The screenshot below is an example of this: One is perfectly square, the next is a smaller square, and the last is a rectangle.

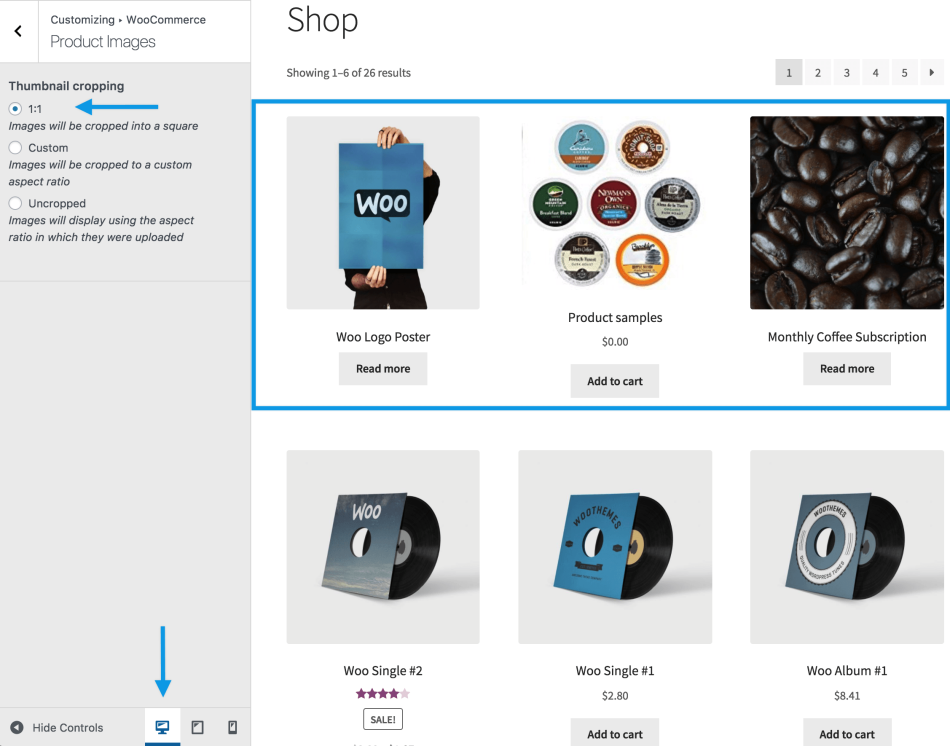
3/ Test on different devices. Below is an example of different views, using the same settings.
- On a computer/laptop screen
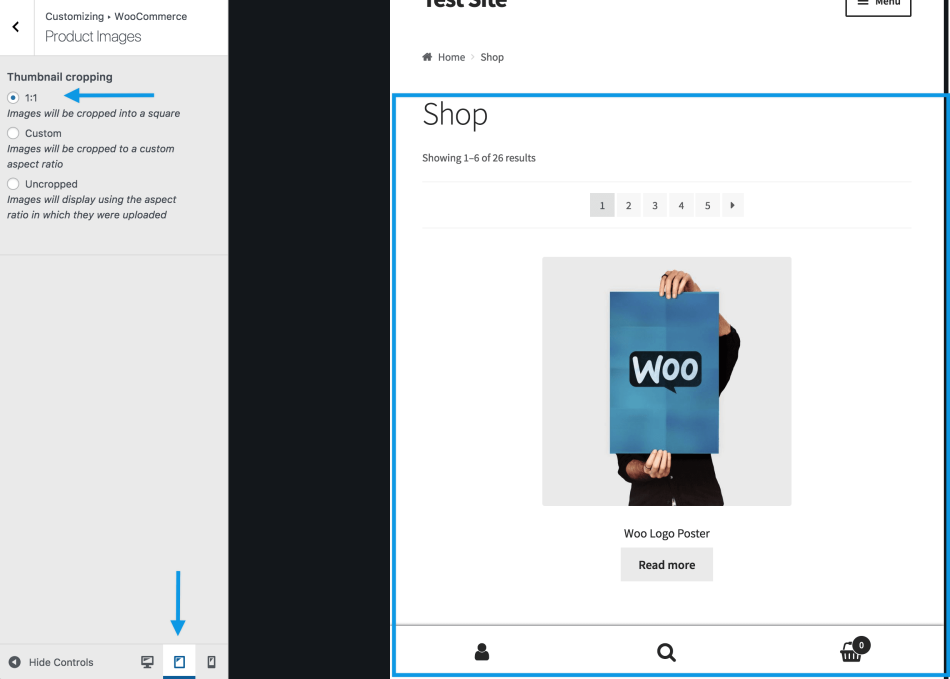
- On a tablet.
- On a mobile device.

4/ Publish to save and go live.
Checkout
All options for Checkout can be found at: Appearance > Customize > WooCommerce > Checkout.
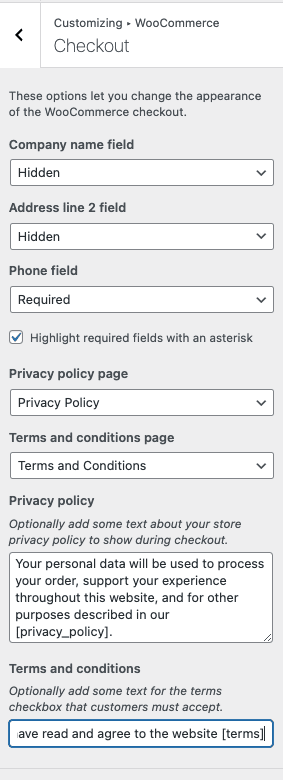
You can now set whether certain fields are required or optional depending on the data you wish to collect. You can also choose to highlight the required fields with an asterisk, which is the default.
It is recommended to create Privacy Policy and Terms and Conditions pages, and then you can set them here. The pages set are linked to along with the text you enter and appear on the Checkout page like this:
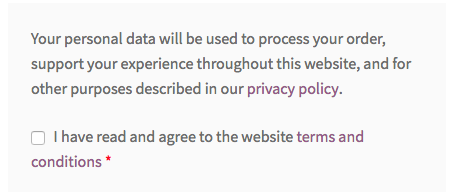
The “privacy policy” link opens the page in a new window, while the “terms and conditions” link opens a box on the page showing the contents of the terms and conditions page. An order cannot be placed without checking the required terms and conditions box.
NOTE: Both shortcode [privacy_policy] and [terms] only work on the above fields.
FAQs
I cannot find WooCommerce Customizer.
Stores using WooCommerce 3.3x+ have this option available at: Appearance > Customize > WooCommerce. Stores using a version of WooCommerce prior to 3.3.0 will see Store Notice and Product Images at: WooCommerce > Settings > Products > Display section; Product Catalog is new.
We recommend updating to the latest version of WooCommerce to take advantage of new and improved features and functionality. Thanks!
Was this article helpful?
That’s Great!
Thank you for your feedback
Sorry! We couldn't be helpful
Thank you for your feedback
Feedback sent
We appreciate your effort and will try to fix the article